An expense records money spent on a date, tied to a payee and a charge code. You can attach receipts, categorize it to an accounting account, mark it billable to a client, and move it through approval. Approved expenses can sync to your accounting system, and reimbursable ones flow into payroll.
Recording an expense
Open Time and Expense → My Expenses and click Add Expense. Fill in the drawer:
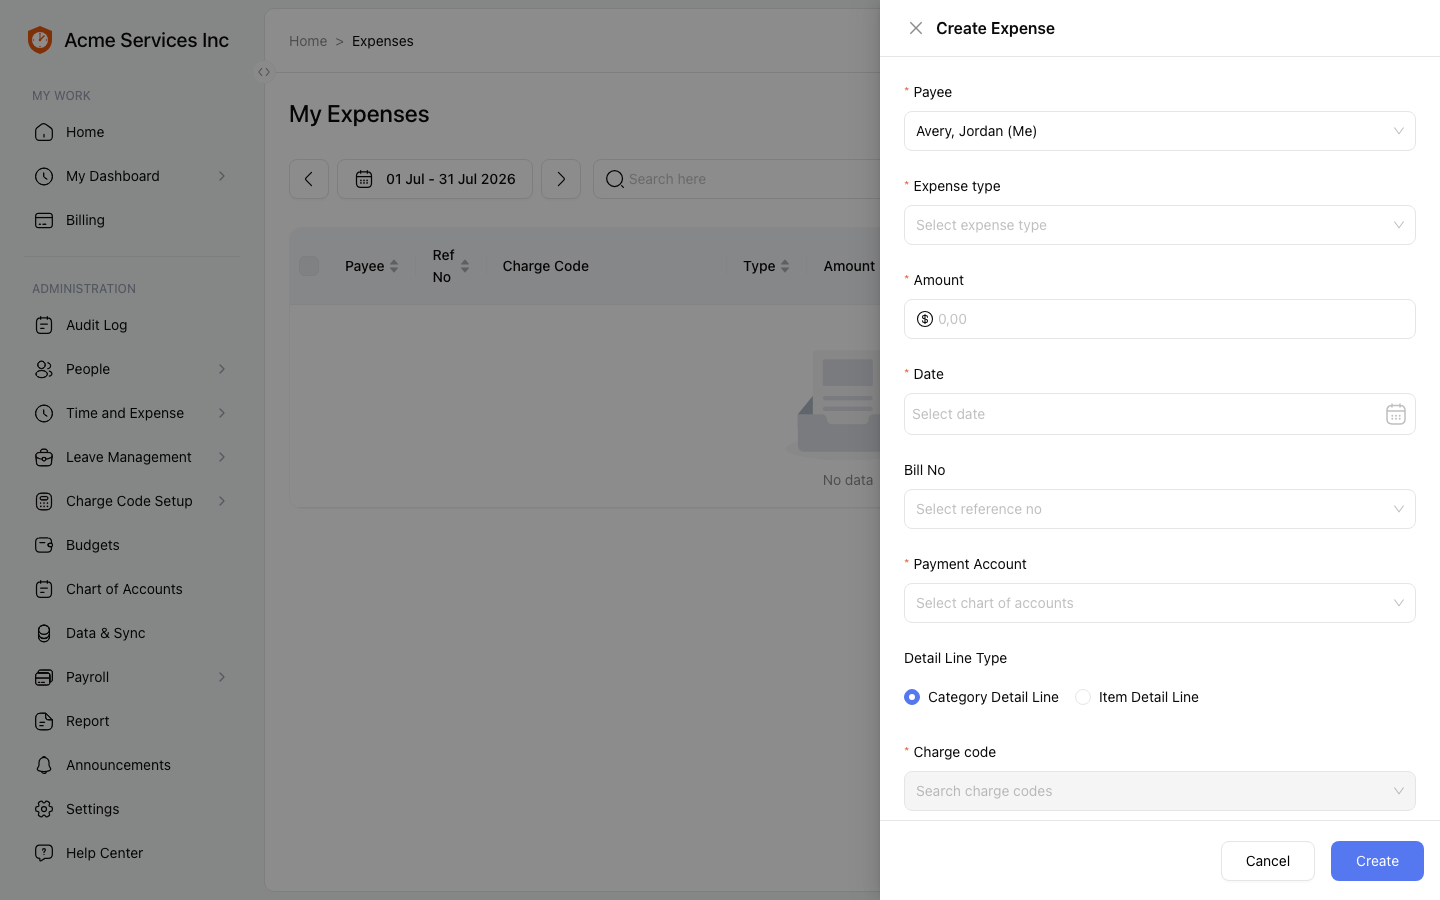
Add Expense: capture the payee, type, amount, charge code, and receipts.
- Payee and Expense type — the type is Reimbursable, Credit Card, Mileage, or Per Diem. Mileage and Per Diem reveal their own fields (distance × rate, or a looked-up GSA per-diem rate for the city/state and travel dates) and calculate the amount for you.
- Amount and Date.
- Charge code and Account — what the expense is charged against and its accounting category.
- Receipts — attach image or PDF files (up to 10 MB each). Your account can require a receipt at creation.
- Billable — mark it as billable to a client.
Click Create to save it.
Submitting and approval
Depending on your account, a new expense either starts as a draft that you submit, or is submitted for approval right away. From the list — or in bulk by selecting rows — you can Submit, and an approver can Approve or Reject (with a reason).
Note
You can’t approve your own expense. As with timesheets, Approve and Reject are disabled on expenses you own — a separate reviewer signs off. Statuses run Draft → Submitted → Approved, then Synced once exported; a rejected expense comes back to you with the reason.
After approval
Approved expenses become available to export to your accounting system from Data & Sync; once exported they show a Synced status. Reimbursable expenses are picked up by payroll so the payee can be reimbursed. Once an expense is attached to a payroll run it is locked against edits and deletion.
Related
- Charge codes, pay types, and assignments — the charge codes and accounts you assign expenses to.
- Generating and exporting reports — the Expense report.