A waiting period holds a leave type until an employee has been employed long enough to use it — for example, “no travel leave in the first two weeks of employment.” You configure it on the leave policy rule; the system enforces it automatically when someone requests that leave.
Add a waiting period to a policy rule
- Go to Leave Management → Leave Type.
- Open the leave type whose policy you want to gate.
- In the policy rule, set the waiting period as an amount and a unit (for example,
2 weeks) alongside the existing accrual fields. - Click Save.
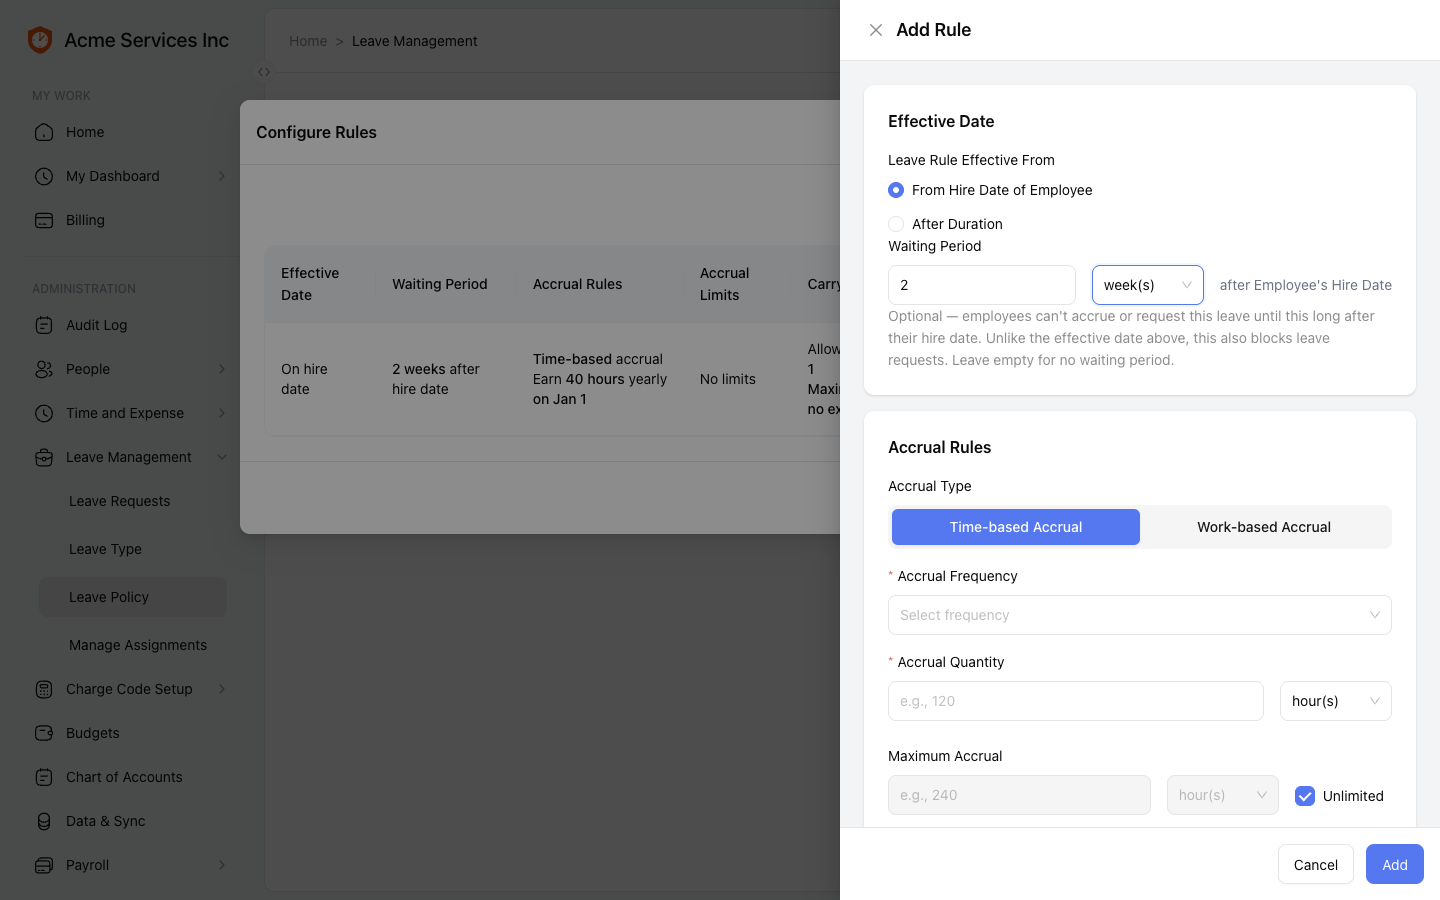
Configure the waiting period as an amount plus a unit, right alongside the accrual fields you already use.
Once saved, the waiting period reads back in the policy summary so you can confirm it at a glance.
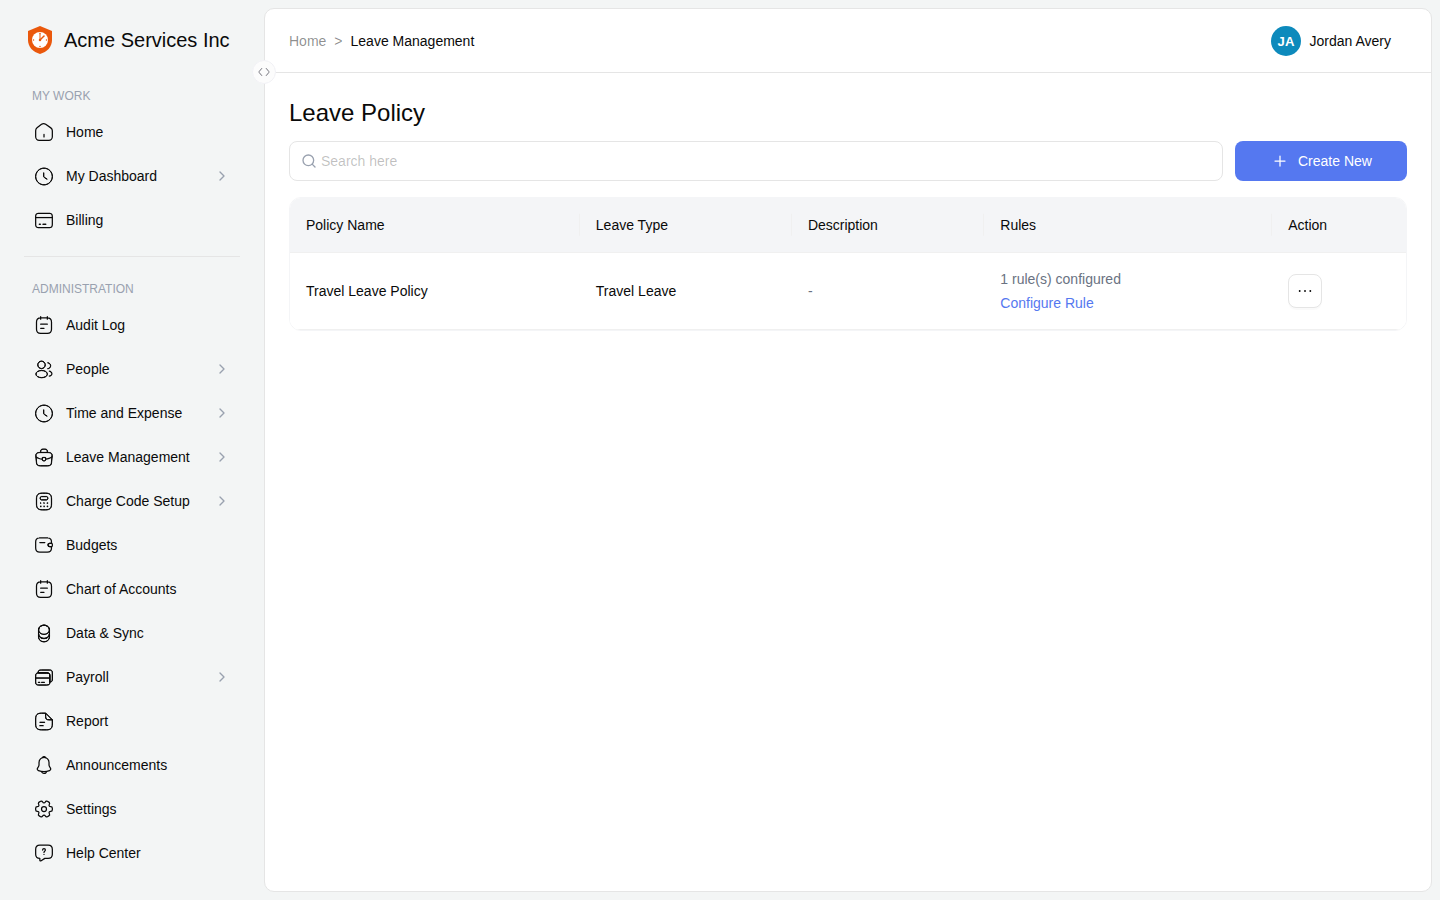
The saved rule shows the waiting period in its summary.
What the employee sees
When an employee requests that leave for a date inside the waiting window, the request is rejected with an actionable message that names the date they become eligible — for example, “You become eligible on 2026-07-24” — not a generic error. The same request succeeds once it’s dated on or after the eligibility date.
Tip
Because the message states the eligibility date, employees usually self-correct without opening a ticket — they simply move the request to a valid date.
Note
The waiting period is measured from the employee’s hire date. If you correct a hire date later, eligibility recalculates from the new date.
Related
- Travel questionnaires — collect trip details on a leave request.
- Team PTO calendar — see approved and pending leave.
- Product overview — a map of every area.